Getting started with Flowplayer
This document describes how to put a video on your site with the right design, behavior, and (optional) advertisement. Once in place, we'll take a look at analytics and see how it performs.
Table of contents
1. Uploading a video
Go to the Videos area and hit the Add videos button:

2. Configure a player
The next thing is to configure a player that matches your site, or some specific area on your site. Please hit Players from the sidebar:

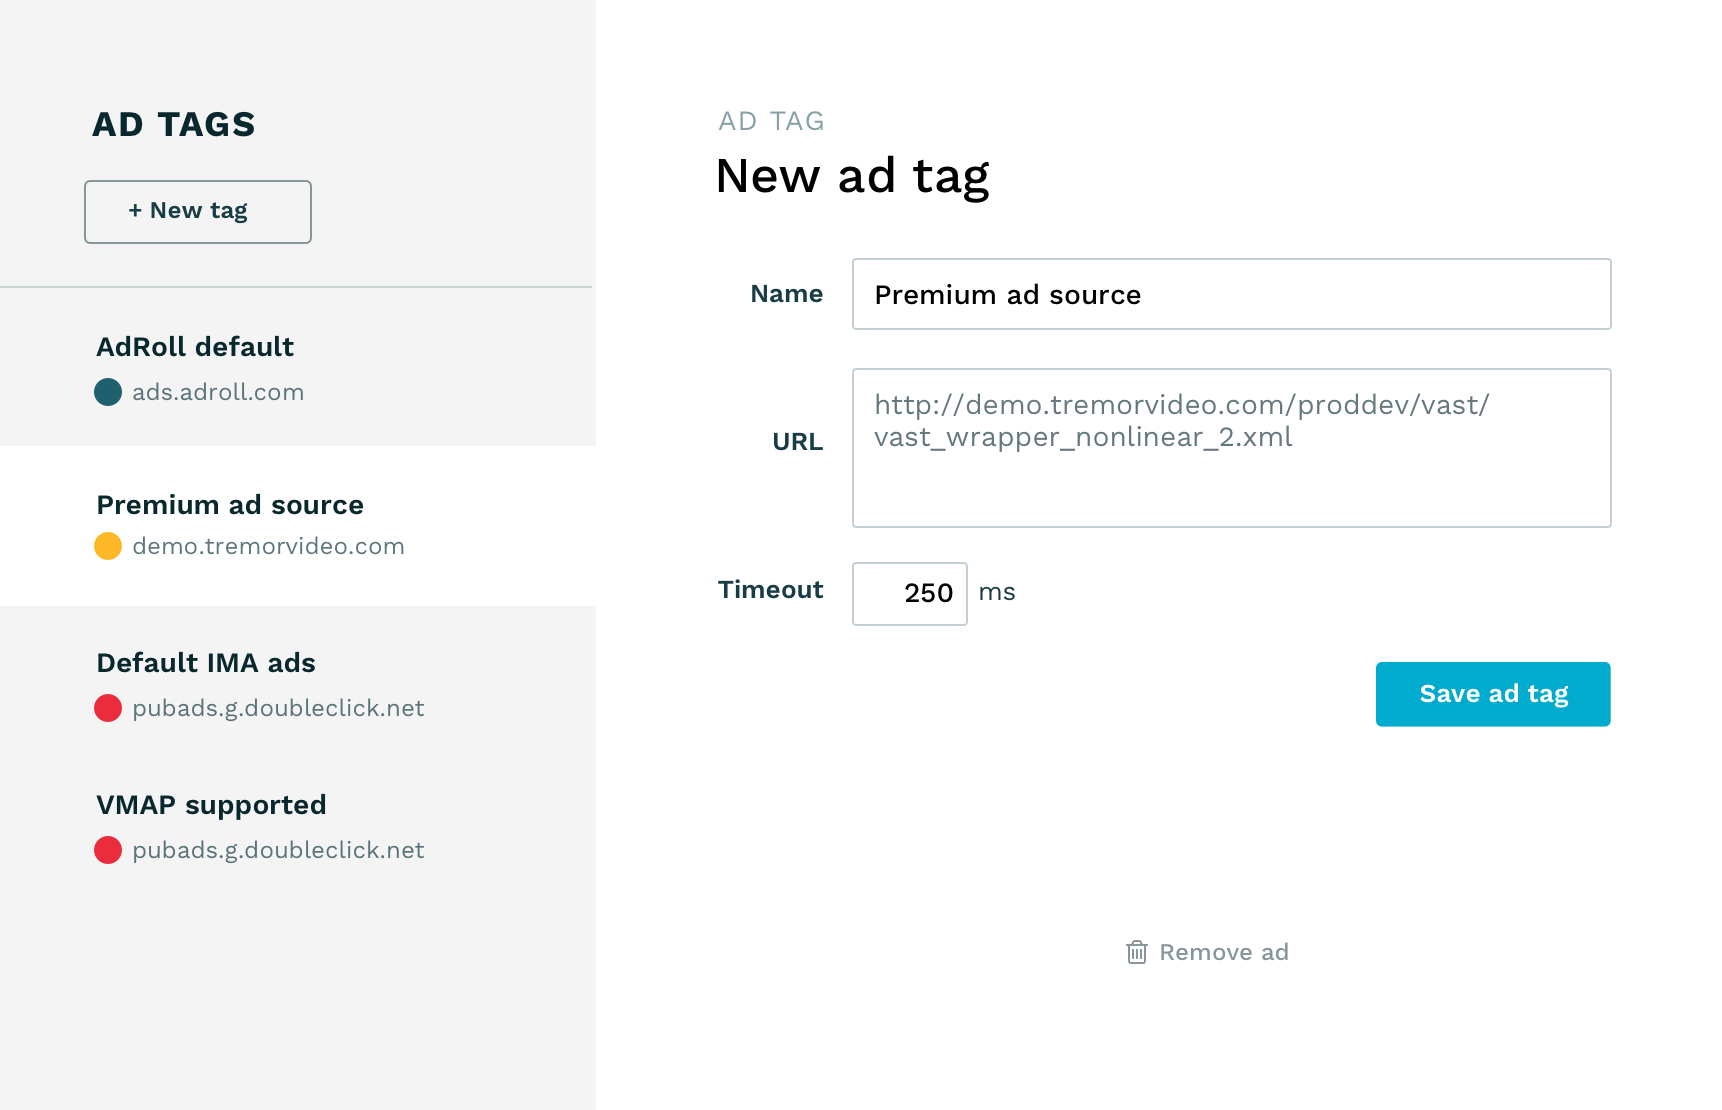
3. Setup advertising
The next thing you might want is to configure advertising. You can create an ad schedule from a list of configurable ad tags. Head on to Advertising area from the sidebar:

4. Embed the video
Now we can embed the video on your website. Please select the correct video and hit the Publish button:

Your player configuration and ad schedule are now available there as options.
Let's play
Here's the above video in action
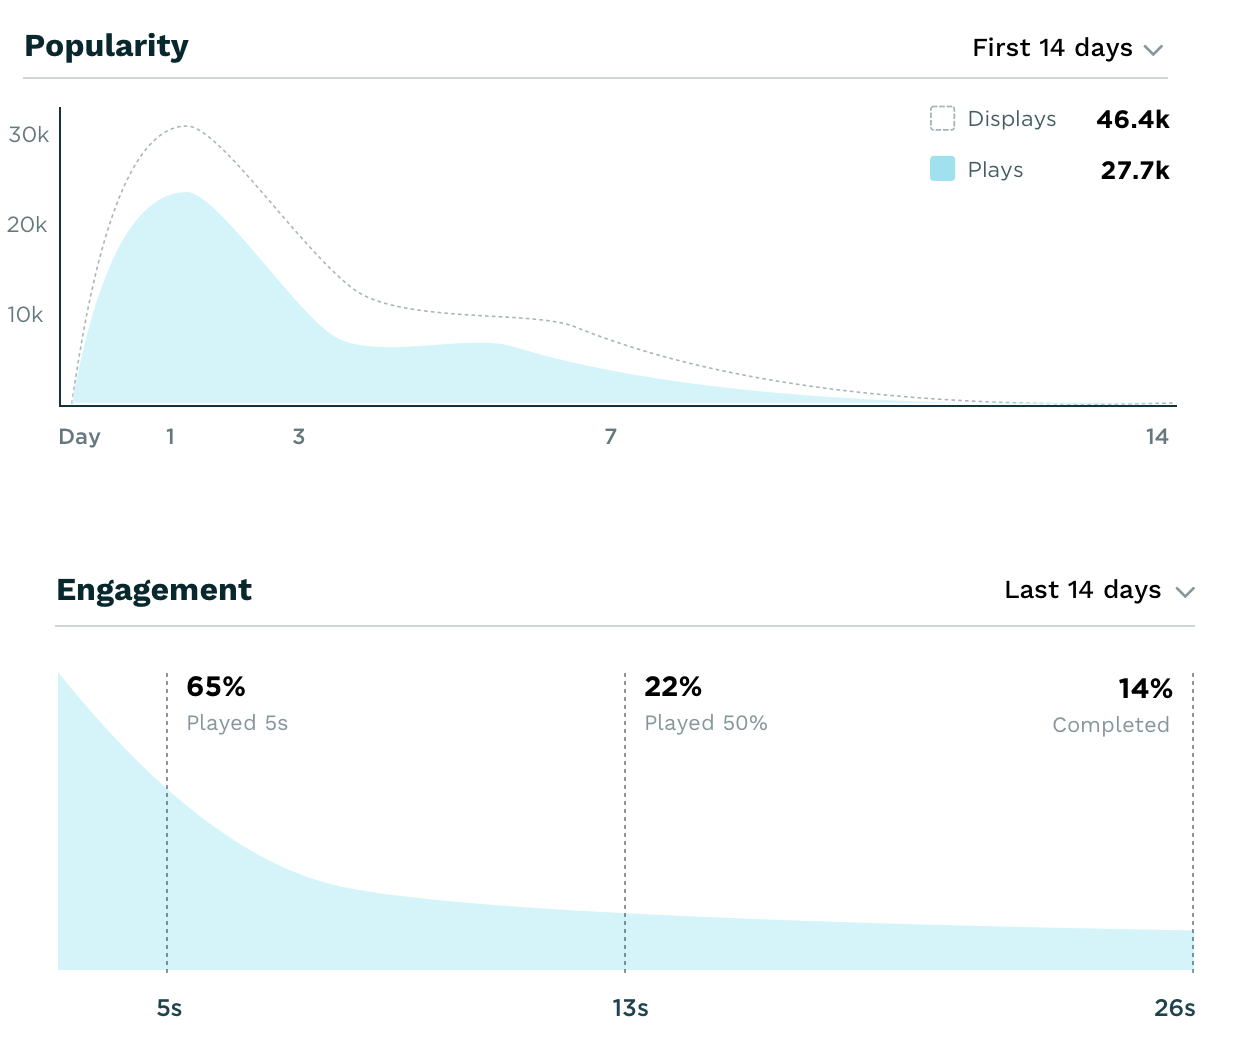
5. View analytics
Next, we can check the Analytics of the video:
6. Self-hosted videos (optional)
You can alternatively host videos on your servers and still take advantage of advertising, player configurations, and analytics. To do that create a remote video asset or grab the embed code just like in above, but choose the "JavaScript" embed style. Then point your video with the src attribute like this:
<div data-player-id="<player id>">
  <script src="//cdn.flowplayer.com/players/<site id>/native/flowplayer.async.js">
    { "src": "<your video path>" }
  </script>
</div>
For details on the src attribute, please check the video source documentation